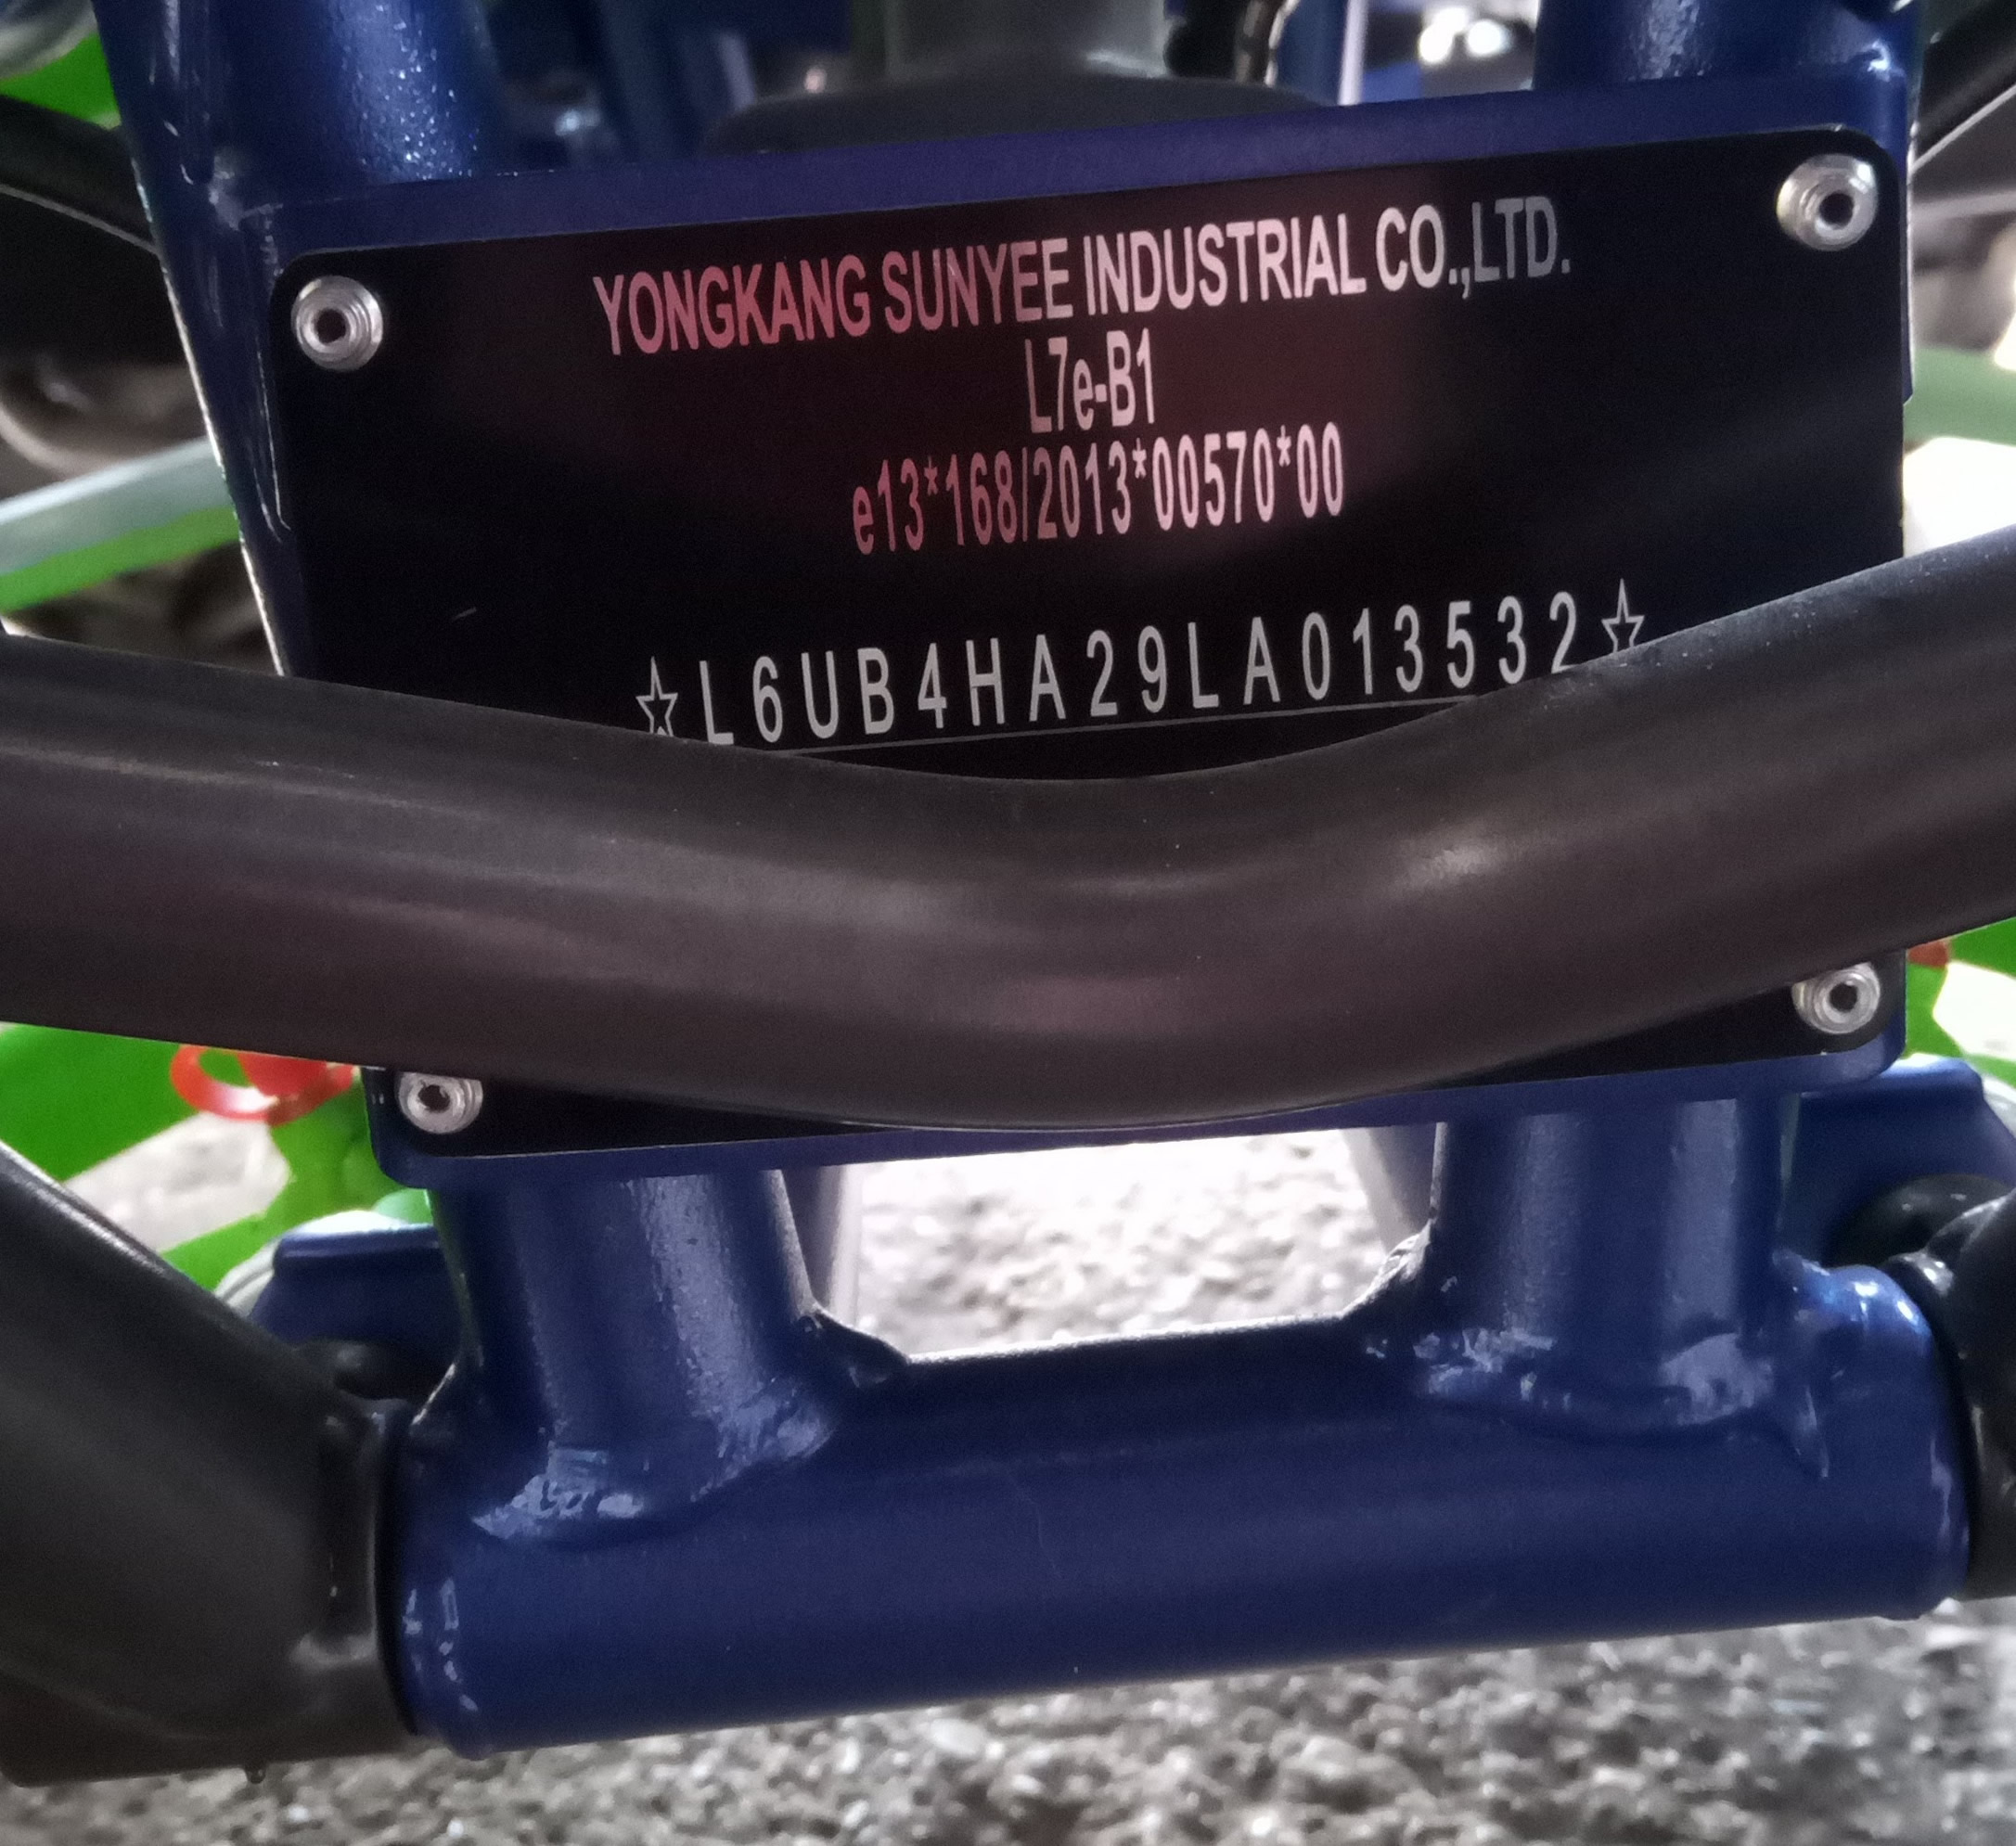
Technical Details
Displacement 200cc
4-stroke single cylinder engine
Tank capacity 5.5lt
Carburetor power supply
unleaded petrol fuel
CDI ignition
Electric start
F-N-R Automanic Transmission

Technical Details
1600mmX930mmX80mm
Aluminum Rims
Front & Rear hydraulic disc brakes
Block tread tires
Front and rear tires 21 / 7-10 20 / 10.00-10
Weight 115 kg
Dimensions 1600mmX930mmX80mm
Double key locks
Chain Drive
Wiring - many wires are not long enough or have their plastic sleeves too short. This is apparent on the front indicators which would have better been routed through the bottom of the nose cone. Instead they are stretched across each side of the front upper grille. Also two circular front spotlights have been added; although they look very nice and are very effective, no thought was made regarding the effect on the electrical system as a whole.The fuse which protects the electrical loom has not been upgraded from its standard 10 amps capacity.
Other details :-
Carburetor - RJ28D1 28194016
Power Calculation - before installing a relay and klaxons it's a good idea to calculate what we're dealing with in terms of consumption. Why ? Because we must use the right amperage fuse so not to damage existing circuitry. The industry standard equation is I = P / E which as we all will remember from out school physics lessons (?) actually means I = Amps, P = Watts, E = Volts. So, it's obvious the amount of amperage fuse we need is the number of watts pulled from the wiring loom divided by the number of volts. Yes, you guessed it, we already know this system is supplied by a 12 volt battery. The tedious part now follows. Now we need to know which consumes what in terms of amps.
My quad Hummer is as follows
|
Item (One Side) |
Watts |
Total (Both Sides) |
|---|---|---|
|
Standard Side Light |
5 |
10 |
|
Standard on Dipped |
23 |
46 |
|
Standard on Main |
46 |
92 (46) |
|
Spotlight on Dipped |
35 |
70 |
|
Spotlight on Main |
70 |
140 |
|
TOTAL LIGHT WATTS |
179 |
348 (302) |
Now, divide the total pull on the electrical system by 12 (the number of volts) .... 348 / 12 = 29 amps.... quite heavy. So having thought about it I decided that having the standard main light AND the spotlight main on at the same time was brighter than the Blackpool illuminations, crazy. To make this more realistic I disconnected the Main Standard light wire meaning full beam is still possible but coming from the spotlights only. Now the pull on the circuitry is not 348 but 302 /12 = 25 amps. The fuse required so not to overload is therefore 25 amps.
Relay and klaxons - it's cheap to purchase a relay and worth every penny if you value your safety. God knows there were too many clueless idiots already on the road before the "evolution" of the mobile telephone. Now there are even more, so cyclists, motorcyclists, ATV pilots, etc need to be heard and able to blast the s**t out of a car driver who's sending or reading their text messages rather than driving responsibly and with attention.
Why and how to install a Relay - As stated before, the drain on the electrical circuitry is heavier when a pair Klaxons is installed and they will not function due to the existing load for the lighting. A relay with it's own protective fuse solves the problem of not being hears when the lights are on. I bought a very nice one made by Fiamm. Here is how to install it....
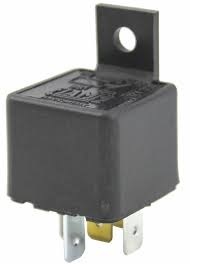
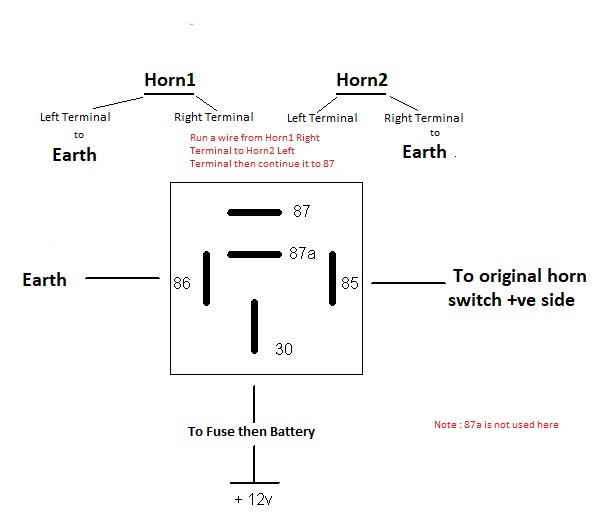
You will need some ignition terminal connectors, the compression tool, colour-coded hood covers, pliers,